
Understanding “NAP” in sewing is crucial for achieving flawless results, especially when working with textured fabrics like velvet or corduroy. NAP refers to the direction of the raised fibers on a fabric’s surface. This direction affects both the visual appearance and the tactile feel of the material.
For instance, fabrics will look darker and shinier when brushed in the with-nap direction, while the against-nap direction will appear rougher and lighter.
By accurately identifying and aligning the NAP, you ensure a consistent and polished look in your sewing projects. Transitioning from recognizing NAP to applying this knowledge in cutting and sewing will significantly enhance the quality of your finished garments.
What Does NAP Mean in Sewing?
In sewing, NAP refers to the direction of the raised surface of a fabric, such as velvet, corduroy, or faux fur. Also known as pile or nap direction, it dictates the smoothness in one direction (with-nap) and roughness in the other (against-nap).
Identifying the NAP is crucial for consistent color and texture. Visual inspection under different lighting conditions and tactile examination reveal the with-nap as darker and shinier. When sewing, cutting pattern pieces in the same direction ensures a uniform appearance.
Special considerations, such as using sharp tools and marking the nap direction, are essential for achieving a professional finish.
Why NAP Direction Matters: Key Reasons for Sewing Success
Understanding NAP (the direction of the raised surface of a fabric) is important in sewing for several reasons:
Consistency in Appearance
Fabrics with a NAP, such as velvet or corduroy, have a distinct texture. Sewing in the same direction ensures a consistent appearance throughout the garment. Ignoring NAP might result in variations in color and sheen, making the finished product look uneven.
Texture and Feel
Fabrics with a NAP feel different when you run your hand over them in different directions. The with-nap direction is smooth, while the against-nap direction is rough. By sewing with the NAP, you maintain the intended texture of the fabric, contributing to the overall feel of the garment.
Professional Finish
Following NAP guidelines contributes to a more professional finish in your sewing projects. It demonstrates attention to detail and craftsmanship, making the garment look well-made and polished.
Avoiding Inconsistencies
Cutting pattern pieces in different directions can lead to inconsistencies in color, texture, and even the way the fabric drapes. Understanding and respecting the NAP helps you avoid these inconsistencies, resulting in a higher-quality finished product.
Preventing Pattern Distortion
Fabrics with a distinct NAP may appear different when viewed from different angles. Sewing against the NAP can distort the pattern and affect the overall visual appeal of the garment.
Optimizing Fabric Usage
When you cut all pattern pieces in the same direction, following the with-nap direction, you may need more fabric than usual. Understanding NAP allows you to optimize fabric usage, ensuring you have enough yardage for a consistent and uniform look.
Minimizing Fabric Damage
Fabrics with a NAP are often delicate and can be easily damaged if not handled properly. Cutting or sewing against the NAP may cause stretching, distortion, or crushing of the fabric, leading to potential damage.
How to Find Fabric NAP: Essential Techniques for Seamstresses
Finding the nap of a fabric is a crucial step in sewing, especially when working with textured materials like velvet, corduroy, or faux fur. Here’s a guide on how to identify the nap of a fabric:
Visual Inspection
Begin by visually inspecting the fabric under different lighting conditions. Observe changes in color or sheen that may occur as you view the fabric from various angles. The with-nap direction often appears darker or shinier than the against-nap direction.
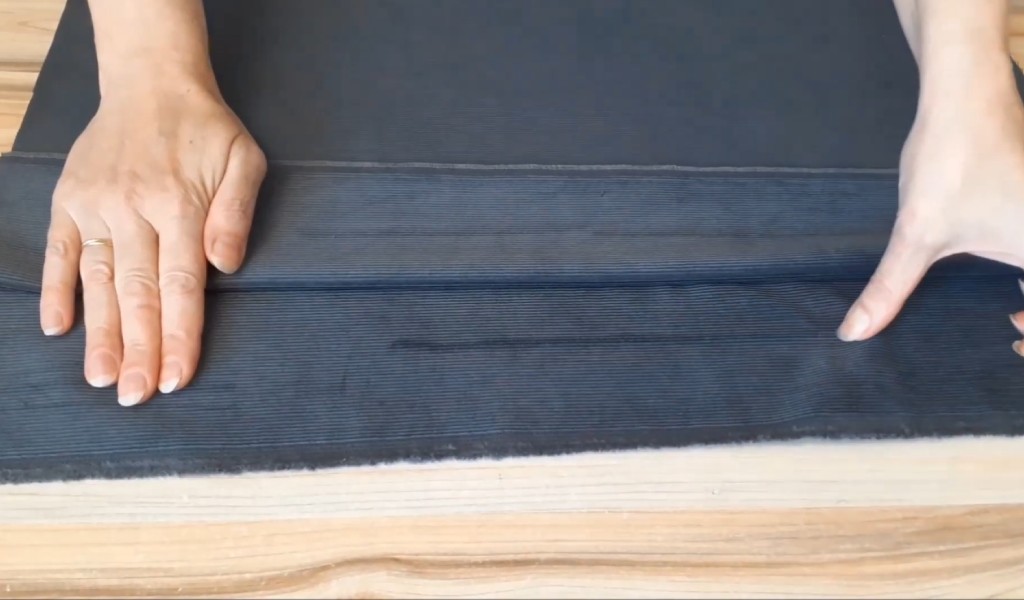
Tactile Inspection
Run your hand over the fabric in different directions. Notice how the fabric feels – it will be smoother in the with-nap direction and rougher in the against-nap direction. This difference in texture is a result of the fibers or hairs of the fabric lying in a specific orientation.
Brush or Comb the Fabric
For fabrics with longer fibers, like faux fur, use a brush or comb. Brushing or combing the fabric in different directions will emphasize the nap. You’ll notice the fibers lying flat in one direction (with-nap) and standing up in the other direction (against-nap).
Check Fabric Edges
Examine the cut edges of the fabric, especially if it has been previously cut. The with-nap direction often appears neater and smoother along the cut edges, while the against-nap direction may show a bit of fuzziness.
Consult Manufacturer’s Information
Check if the manufacturer provides any information about the nap direction on the fabric swatch or in the product details. Some fabrics come with clear markings or instructions regarding the with-nap direction.
Perform a Pin Test
Insert a pin into the fabric and pay attention to the resistance. In the with-nap direction, the pin may glide more smoothly, while in the against-nap direction, you may feel more resistance. This can serve as a tactile confirmation of the nap direction.
Use a Nap Gauge
Consider using a nap gauge, a tool designed for determining the direction of the nap. A nap gauge typically has brushes that you can run over the fabric in different directions. The brushes may catch more on the against-nap side, aiding in the identification process.
Top Key Considerations for Sewing with Fabric NAP: Essential Tips
When sewing with fabrics that have a nap, it’s essential to take specific considerations into account to ensure a professional and polished outcome. Here are key considerations:
Identify the NAP
Before cutting your fabric, identify the direction of the nap. Run your hand over the fabric to feel the difference in texture between the with-nap and against-nap directions. Additionally, visually inspect the fabric for changes in color or sheen that may indicate the nap direction.
Cutting Direction
Cut all your pattern pieces in the same direction, following the with-nap direction. This consistency ensures that the texture and appearance of the fabric remain uniform across the garment. Use markings or pins to indicate the nap direction on your fabric.
Allow for Extra Yardage
Fabrics with a nap often require more yardage than usual. Be sure to purchase enough fabric to accommodate the nap, as cutting all pieces in the same direction may result in more significant fabric consumption.
Use Sharp Tools
Use sharp scissors or a rotary cutter to cut your fabric. Dull tools may crush or damage the nap, affecting the overall appearance of the garment. Clean, precise cuts help maintain the integrity of the fabric’s texture.
Prevent Dragging or Stretching
Be cautious when handling the fabric to avoid dragging or stretching it during cutting. Gently lift the fabric as you cut to prevent distortion and maintain the nap’s direction.
Mark the Nap Direction
Clearly mark the with-nap direction on your fabric pieces using chalk or pins. This visual cue will help you stay consistent during the sewing process, minimizing the risk of errors.
Pressing Techniques
Use a low temperature when ironing fabrics with a nap, and always use a pressing cloth to protect the surface. Press lightly in the direction of the nap to avoid flattening or crushing the raised fibers. Be mindful not to over-press, as this can affect the texture.
Select Appropriate Feet
When sewing, use a walking foot or a roller foot. These specialty presser feet help feed the fabric evenly, preventing slipping or shifting during sewing. Using the correct foot contributes to the overall stability of the sewing process.
Adjust Stitch Length and Tension
Opt for a longer stitch length and lower tension when sewing with fabrics that have a nap. This helps reduce bulk and minimizes the risk of puckering or pulling in the fabric.
Avoid Backstitching at Seams
To minimize bulk, especially in areas where seams intersect, avoid backstitching at the beginning and end of your seams. Instead, secure the stitches using other methods, such as tying threads.
Careful Seam Corrections
If adjustments or corrections are needed, use a seam ripper or a razor blade with care. Avoid ripping or tearing the nap, as this can permanently damage the fabric’s texture.
NAP vs. No NAP: 5 Essential Considerations for Sewing Success
When sewing, distinguishing between fabrics with NAP and those without is crucial for a successful project. Understanding these differences helps ensure your garment looks and feels as intended.
Here’s a closer look at the key considerations for both scenarios:
1. Fabric Characteristics
- NAP Fabrics: Fabrics with NAP, such as velvet, corduroy, and faux fur, have a raised texture that can affect their appearance and feel. The direction of the NAP significantly influences how the fabric looks, with variations in color and sheen depending on the direction of the pile.
- No NAP Fabrics: On the other hand, fabrics without NAP, such as cotton or polyester, have a uniform surface. They do not show directional changes in texture or color, which simplifies cutting and sewing processes.
2. Cutting and Sewing
- NAP Fabrics: When working with NAP fabrics, it’s essential to cut all pattern pieces in the same direction to ensure a consistent look. For example, cutting all pieces with the NAP facing the same way helps maintain a uniform texture and color across the garment. Transitioning between different NAP directions can lead to noticeable inconsistencies and an uneven appearance.
- No NAP Fabrics: With fabrics lacking NAP, you have more flexibility in cutting and sewing. You do not need to worry about directional changes affecting the garment’s overall look. As a result, cutting can be quicker and less precise regarding direction, allowing for easier pattern adjustments.
3. Visual and Textural Impact
- NAP Fabrics: Fabrics with NAP create a distinctive visual effect and texture. The with-nap direction often appears smoother and shinier, while the against-nap side may look duller. This variance can enhance or alter the aesthetic appeal of the garment, making attention to NAP direction crucial for achieving the desired result.
- No NAP Fabrics: In contrast, fabrics without NAP maintain a consistent visual and textural impact. The uniform surface ensures that the appearance remains constant, regardless of the cutting direction. This consistency can be advantageous for achieving a straightforward, cohesive look.
4. Handling and Maintenance
- NAP Fabrics: Handling NAP fabrics requires care to avoid damage and ensure a high-quality finish. Special techniques, such as using sharp tools and pressing lightly in the direction of the NAP, are necessary to preserve the fabric’s texture and prevent distortion.
- No NAP Fabrics: Fabrics without NAP are generally easier to handle and maintain. They are less prone to damage from cutting and pressing, and standard sewing techniques are typically sufficient.
5. Fabric Usage
- NAP Fabrics: You may need extra yardage when working with NAP fabrics due to the requirement of cutting all pieces in the same direction. This additional fabric ensures that all parts of the garment match in appearance and texture.
No NAP Fabrics: For fabrics without NAP, you can often use your fabric more efficiently. There’s no need to account for directional cuts, which can help reduce waste and streamline the cutting process.
FAQs
Fabrics like velvet, corduroy, faux fur, and others with raised surfaces or directional fibers often have a distinct NAP.
Yes, fabrics with a nap may require more yardage than usual. Cutting all pieces in the same direction necessitates additional fabric for consistency.
While you can use a regular foot, using a walking foot or a roller foot is recommended for even fabric feeding and preventing slipping.
Ignoring the NAP may lead to inconsistencies in color and texture in the finished garment, compromising the overall quality.
Use a low temperature, a pressing cloth, and press lightly in the direction of the NAP to avoid flattening or crushing the raised surface.
In sewing, “with nap” means cutting fabric pieces in the same direction to maintain texture consistency, while “without nap” allows varied cutting orientations.
Leave a Reply