
- Upper Thread Tension Explained: How It Affects Your Sewing Machine
- How to Identify Sewing Machine Tension Issues: A Comprehensive Guide
- 7 Essential Steps for Adjusting Upper Thread Tension on Your Sewing Machine
- Common Mistakes to Avoid When Adjusting Tension
- Factors That Influence Tension Settings
- Troubleshooting: What to Do If Adjusting Tension Doesn’t Work
- Bonus Tips for Perfecting Your Stitches
Welcome to our Beginner’s Guide to Adjusting Upper Thread Tension on Any Sewing Machine. Properly adjusting upper thread tension is crucial for achieving perfect stitches and ensuring your sewing projects turn out beautifully.
This guide will help you understand the basics of upper thread tension, including how to identify common tension issues and the steps to adjust your sewing machine effectively.
By following our expert tips and avoiding common mistakes, you’ll master the art of tension adjustment and enhance your sewing skills. Whether you’re working with lightweight fabrics or heavy materials, understanding and adjusting the upper thread tension will ensure your stitches are balanced, strong, and professional-looking.
Upper Thread Tension Explained: How It Affects Your Sewing Machine
Upper thread tension refers to the amount of pressure applied to the upper thread as it passes through the sewing machine. It is controlled by a tension dial or knob on the machine, and it plays a critical role in ensuring that the upper and lower threads interlock correctly to create balanced stitches.
If the upper thread tension is too tight, the thread will be pulled too tightly across the fabric, causing puckering or the fabric to bunch up. On the other hand, if the tension is too loose, the upper thread may not pull through the fabric adequately, leading to loose, messy stitches that can easily unravel.
How Upper Thread Tension Affects Stitch Quality
Proper upper thread tension ensures that your stitches are even and secure, with the thread forming a smooth, tight loop with the bobbin thread underneath. When the tension is correctly balanced, the stitches will appear neat and consistent on both sides of the fabric.
Imbalanced tension can lead to common sewing issues, such as:
- Loose stitches: Caused by insufficient upper thread tension.
- Puckered fabric: A result of excessive tension, where the fabric gathers too much.
Difference Between Upper and Lower Thread Tension
To create a strong, balanced stitch, both the upper thread tension and the lower thread tension (or bobbin tension) must work together in harmony.
- Upper thread tension: This controls the amount of tension on the top thread as it is pulled through the fabric.
- Lower thread tension: This regulates the tension on the bobbin thread as it interacts with the upper thread to form a stitch.
How to Identify Sewing Machine Tension Issues: A Comprehensive Guide
Recognizing tension issues on your sewing machine is essential for maintaining stitch quality. Misadjusted tension can result in messy, weak, or uneven stitches, which can compromise the durability and appearance of your project.
In this section, we’ll show you how to spot and resolve common tension problems.
Signs of Tension Issues
- Loose Stitches on Top: If your upper stitches appear loose or form loops on the fabric’s surface, the upper thread tension is too loose. This can happen if the tension dial is set too low, causing the upper thread to feed too freely through the machine.
- Puckering or Tight Stitches: When the fabric puckers or the stitches are too tight, it’s usually a sign that the upper thread tension is set too high. The upper thread pulls too tightly, creating uneven stitches and wrinkles in the fabric.
- Uneven Stitches on the Underside: If the bobbin thread is visible on the top side of your fabric or forms loops underneath, the lower thread tension might be too loose in relation to the upper thread tension.
Step-by-Step to Identify Tension Problems
- Test Stitches on Scrap Fabric: Before adjusting tension, always test stitches on a scrap piece of fabric similar to your project material. This helps you quickly identify tension issues without damaging your main fabric.
- Examine Both Sides of the Fabric: After testing, check the appearance of the stitches on both the top and bottom sides. Balanced tension will result in evenly formed stitches on both sides, with no visible loops or puckering.
- Adjust Upper Thread Tension First: Start by adjusting the upper thread tension dial. Small, incremental changes can make a big difference. If you’re unsure, begin with the default setting and adjust gradually.
- Check Needle and Thread Compatibility: Sometimes tension issues stem from mismatched needles and threads. Make sure you are using the correct needle size and thread type for your fabric.
7 Essential Steps for Adjusting Upper Thread Tension on Your Sewing Machine
Adjusting the upper thread tension on your sewing machine is a straightforward process that can significantly enhance your stitch quality. Follow this step-by-step guide to achieve perfectly balanced stitches every time.
Step 1: Locate the Tension Dial
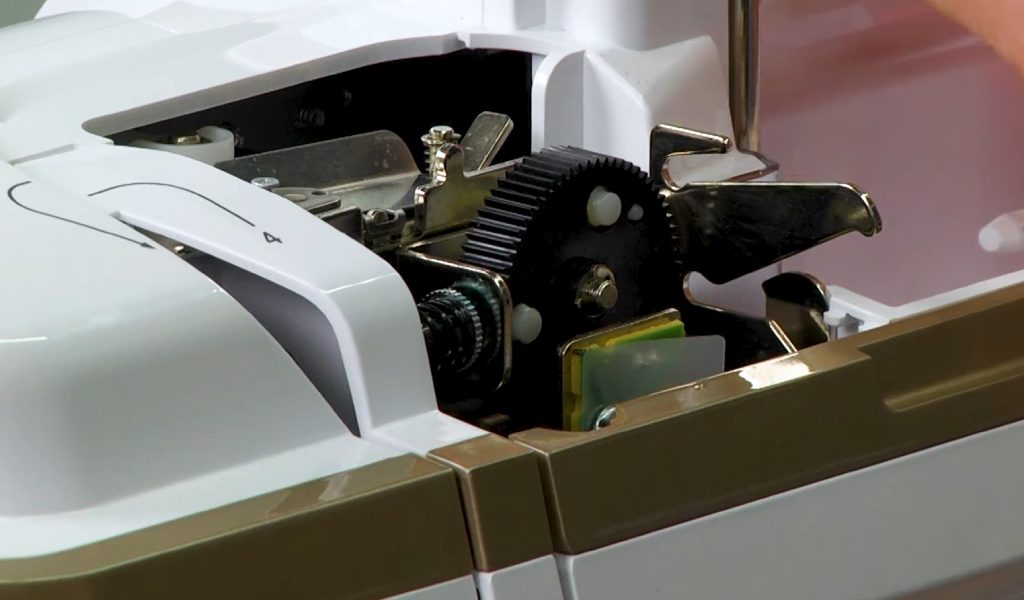
The first step in adjusting the upper thread tension is to find the tension dial or knob on your sewing machine. This is usually located on the front panel or the top of the machine. Consult your machine’s manual if you’re unsure of its exact location.
Step 2: Test Stitches on Scrap Fabric
Before making any adjustments, sew a few test stitches on a scrap piece of fabric that matches your project material. This helps you assess the current tension settings and determine if adjustments are necessary.
Step 3: Evaluate the Stitch Quality
Examine the stitches on both the top and bottom sides of the scrap fabric. Look for signs of tension issues such as:
- Loose stitches on the top: Indicates the upper thread tension may be too loose.
- Puckered fabric or tight stitches: Suggests that the upper thread tension is too high.
Step 4: Make Small Adjustments
If you identify tension issues, adjust the tension dial incrementally. To increase tension, turn the dial or knob slightly clockwise. To decrease tension, turn it counterclockwise. Make small adjustments to avoid over-correcting.
Step 5: Sew More Test Stitches
After each adjustment, sew additional test stitches on your scrap fabric. This allows you to see how the changes affect stitch quality. Continue making small adjustments until you achieve even, balanced stitches on both sides of the fabric.
Step 6: Check Needle and Thread
Ensure you are using the correct needle size and type for your fabric and thread. Mismatched needles and threads can affect tension settings. Replace or adjust as needed to improve stitching.
Step 7: Document Your Settings
Once you achieve the desired stitch quality, make a note of the tension settings that worked best. This will help you quickly adjust the tension for similar fabrics and projects in the future.
Common Mistakes to Avoid When Adjusting Tension
Properly adjusting thread tension can be challenging, especially for beginners. Avoiding common mistakes will help you achieve optimal stitch quality and prevent issues that can arise from incorrect tension settings.
Ignoring the Needle and Thread Compatibility
One major mistake is neglecting to check if the needle and thread are suitable for your fabric. Using the wrong needle size or type can affect the upper thread tension and lead to poor stitch quality. Always match the needle and thread to your fabric to ensure smooth sewing.
Making Large Adjustments
When adjusting the upper thread tension, avoid making large changes. Instead, make small, incremental adjustments. Large shifts can drastically alter stitch quality and may not resolve the issue effectively. Gradual adjustments allow for more precise control.
Failing to Test on Scrap Fabric
Another common mistake is skipping the step of testing tension adjustments on scrap fabric. Testing on a scrap piece that matches your project material helps you evaluate the effects of your adjustments before working on your actual fabric.
Overlooking the Bobbin Tension
While focusing on upper thread tension, don’t overlook the bobbin tension. Imbalances between the upper and lower tensions can cause stitching problems. Check and adjust the bobbin tension if needed to ensure both tensions are properly balanced.
Neglecting Regular Machine Maintenance
Dirty or poorly maintained sewing machines can lead to tension issues. Dust and lint can interfere with the thread tension and cause inconsistent stitching. Regularly clean your machine and keep the tension discs and thread path free of debris.
Not Referencing the Manual
Failing to consult your sewing machine’s manual can result in improper adjustments. The manual provides specific instructions for your machine model, including recommended tension settings and how to locate the tension dial. Always refer to the manual for guidance.
Ignoring Fabric Type Variations
Different fabrics require different tension settings. Using a single tension setting for all fabrics can lead to poor results. Adjust the upper thread tension according to the fabric type you’re working with, whether it’s lightweight silk or heavy denim.
Factors That Influence Tension Settings
Adjusting thread tension effectively requires understanding several key factors that can impact your sewing results. Here’s a look at the primary elements that influence tension settings and how to address them.
Fabric Type
The type of fabric you are using has a significant impact on tension settings. Different fabrics, such as lightweight silk or heavy denim, require different tension adjustments. For delicate fabrics, you may need lower tension, while thicker fabrics may require higher tension settings.
- For lightweight fabrics: Use lower tension to prevent puckering.
- For heavy fabrics: Increase tension to ensure stitches penetrate through the thicker material.
Thread Thickness
The thickness of the thread you use also affects the upper thread tension. Thicker threads typically require higher tension settings, while finer threads may need lower tension.
- Thick threads: Increase tension to ensure they are properly secured in the fabric.
- Thin threads: Reduce tension to prevent thread breakage or bunching.
Sewing Speed
The speed at which you sew can influence tension settings. Sewing at higher speeds can sometimes cause the thread to slip or become unevenly tensioned.
- High-speed sewing: May require adjustments to prevent tension issues.
- Slow sewing: Often results in more consistent tension but can be less effective for heavy fabrics.
Needle Size and Type
The size and type of needle you use are crucial for proper tension settings. A needle that is too large or too small for your thread can affect how the thread interacts with the fabric.
- Correct needle size: Ensure it matches the thread and fabric to achieve optimal tension.
- Needle type: Use the appropriate needle type (e.g., ballpoint for knits, universal for woven fabrics) to prevent tension problems.
Thread Quality
High-quality thread contributes to more consistent tension settings. Low-quality or damaged thread can cause tension issues such as breakage or uneven stitching.
- Use high-quality thread: It helps maintain even tension and reduces the risk of tension-related problems.
Machine Maintenance
Regular maintenance of your sewing machine can influence thread tension. Lint, dust, and worn parts can affect how the thread flows through the machine.
- Clean your machine regularly: Ensure the tension discs and thread path are free from debris to maintain proper tension.
Troubleshooting: What to Do If Adjusting Tension Doesn’t Work
If you’ve adjusted the upper thread tension but are still experiencing stitching issues, there may be other factors at play. Here’s a troubleshooting guide to help you identify and resolve persistent problems.
Check the Needle Condition
If adjusting tension doesn’t resolve your issue, inspect the needle. A damaged or dull needle can cause stitching problems despite correct tension settings. Replace the needle with a new one that’s appropriate for your fabric and thread.
Examine Thread Quality
Low-quality or mismatched thread can lead to stitching problems. Ensure you’re using high-quality thread that’s compatible with your fabric. Replace the thread if it appears frayed or uneven to see if this resolves the tension issue.
Clean the Sewing Machine
A dirty machine can cause tension problems by interfering with thread flow. Regularly clean your sewing machine, focusing on the tension discs and the area where the thread passes through. Remove any lint, dust, or debris that might affect tension.
Check Bobbin Tension
If you’re still having trouble, the issue might be with the bobbin tension rather than the upper thread tension. Check and adjust the bobbin tension if necessary. An imbalance between the upper and lower thread tensions can lead to poor stitch quality.
Verify Thread Path
Ensure that the thread is correctly threaded through all guides and tension discs. A misthreaded machine can cause inconsistent tension and poor stitching. Rethread the machine if you suspect this might be the issue.
Consult the Manual
Refer to your sewing machine’s manual for specific troubleshooting advice related to your model. The manual can provide guidance on adjusting both the upper and bobbin tensions, as well as other potential issues affecting stitch quality.
Seek Professional Help
If you’ve tried all these steps and the problem persists, it might be time to consult a professional. A sewing machine technician can diagnose and fix more complex issues that might be affecting your machine’s performance.
Bonus Tips for Perfecting Your Stitches
Achieving perfect stitches involves more than just adjusting the upper thread tension. Here are some bonus tips to help you fine-tune your sewing and ensure flawless results every time.
Choose the Right Needle for Your Fabric
Selecting the appropriate needle for your fabric type is crucial. Use a needle that matches the thickness and type of your fabric to ensure smooth stitching. For example, use a ballpoint needle for knits and a sharp needle for woven fabrics.
Use High-Quality Thread
Opt for high-quality thread that is compatible with your fabric and sewing machine. Low-quality or mismatched thread can lead to issues with tension and stitch quality. Invest in good thread to enhance your sewing results.
Maintain Your Sewing Machine
Regular maintenance is essential for consistent stitch quality. Clean your machine frequently, including the bobbin case, tension discs, and other parts where lint and dust can accumulate. Regular servicing by a professional can also keep your machine in top condition.
Test Different Fabrics
When working with new or unfamiliar fabrics, always test your tension settings on a scrap piece of the same fabric. This helps you make necessary adjustments before starting on your actual project, ensuring better results.
Adjust for Different Sewing Techniques
Different sewing techniques may require different tension settings. For instance, when sewing seams versus hems or decorative stitches, you might need to adjust the upper thread tension to accommodate various stitch types and techniques.
Check for Proper Threading
Ensure that your sewing machine is threaded correctly. Incorrect threading can lead to tension issues and poor stitch formation. Follow your machine’s threading guide to make sure the thread passes through all necessary guides and tension discs.
Keep a Sewing Journal
Maintain a journal of your tension settings and adjustments for various fabrics and projects. Documenting what works best can save you time and effort on future projects by providing a quick reference for successful settings.
Leave a Reply